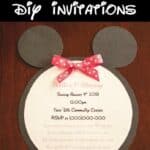
First you will need to print off the information part of the invitation. I typed mine up in word, you can also use google docs. Then you will print out as many invitation papers as you need.
If you are going for the full Disney look you will need to go here and download the Disney font. You can always chose your favorite font to use instead. I found that font size 22 works great for the header and font 16 works great for the rest.
If you have a lot to write on the invitation you will need to play with the font to make sure it fits within your circle.
Using the medium circle cut out the white paper with all the information on it. Making sure you leave a small amount of room at the top where the bow will go.Trace the envelope onto the corner of the black poster board with the white pencil.Take your largest circle, place it in the outlined space and trace it for the head of Minnie. Take your smallest circle and trace two of them on the top for its ears.Cut out just the outside of the Minnie shape. You can use that cut out as your template to cut out the other Minnie's.With your glue stick, glue the white circle onto the black circle leaving a equal amount around each side.Cut your ribbon 6 inches long.With the ribbon you will need to make a small bow. Follow the photos for how to fold your ribbon to make Minnie Mouse's bow. Then cut the ends so they are equal.With your hot glue, glue the bow to Minnie's head.
